
By Vida Gustafson
Contributing Writer
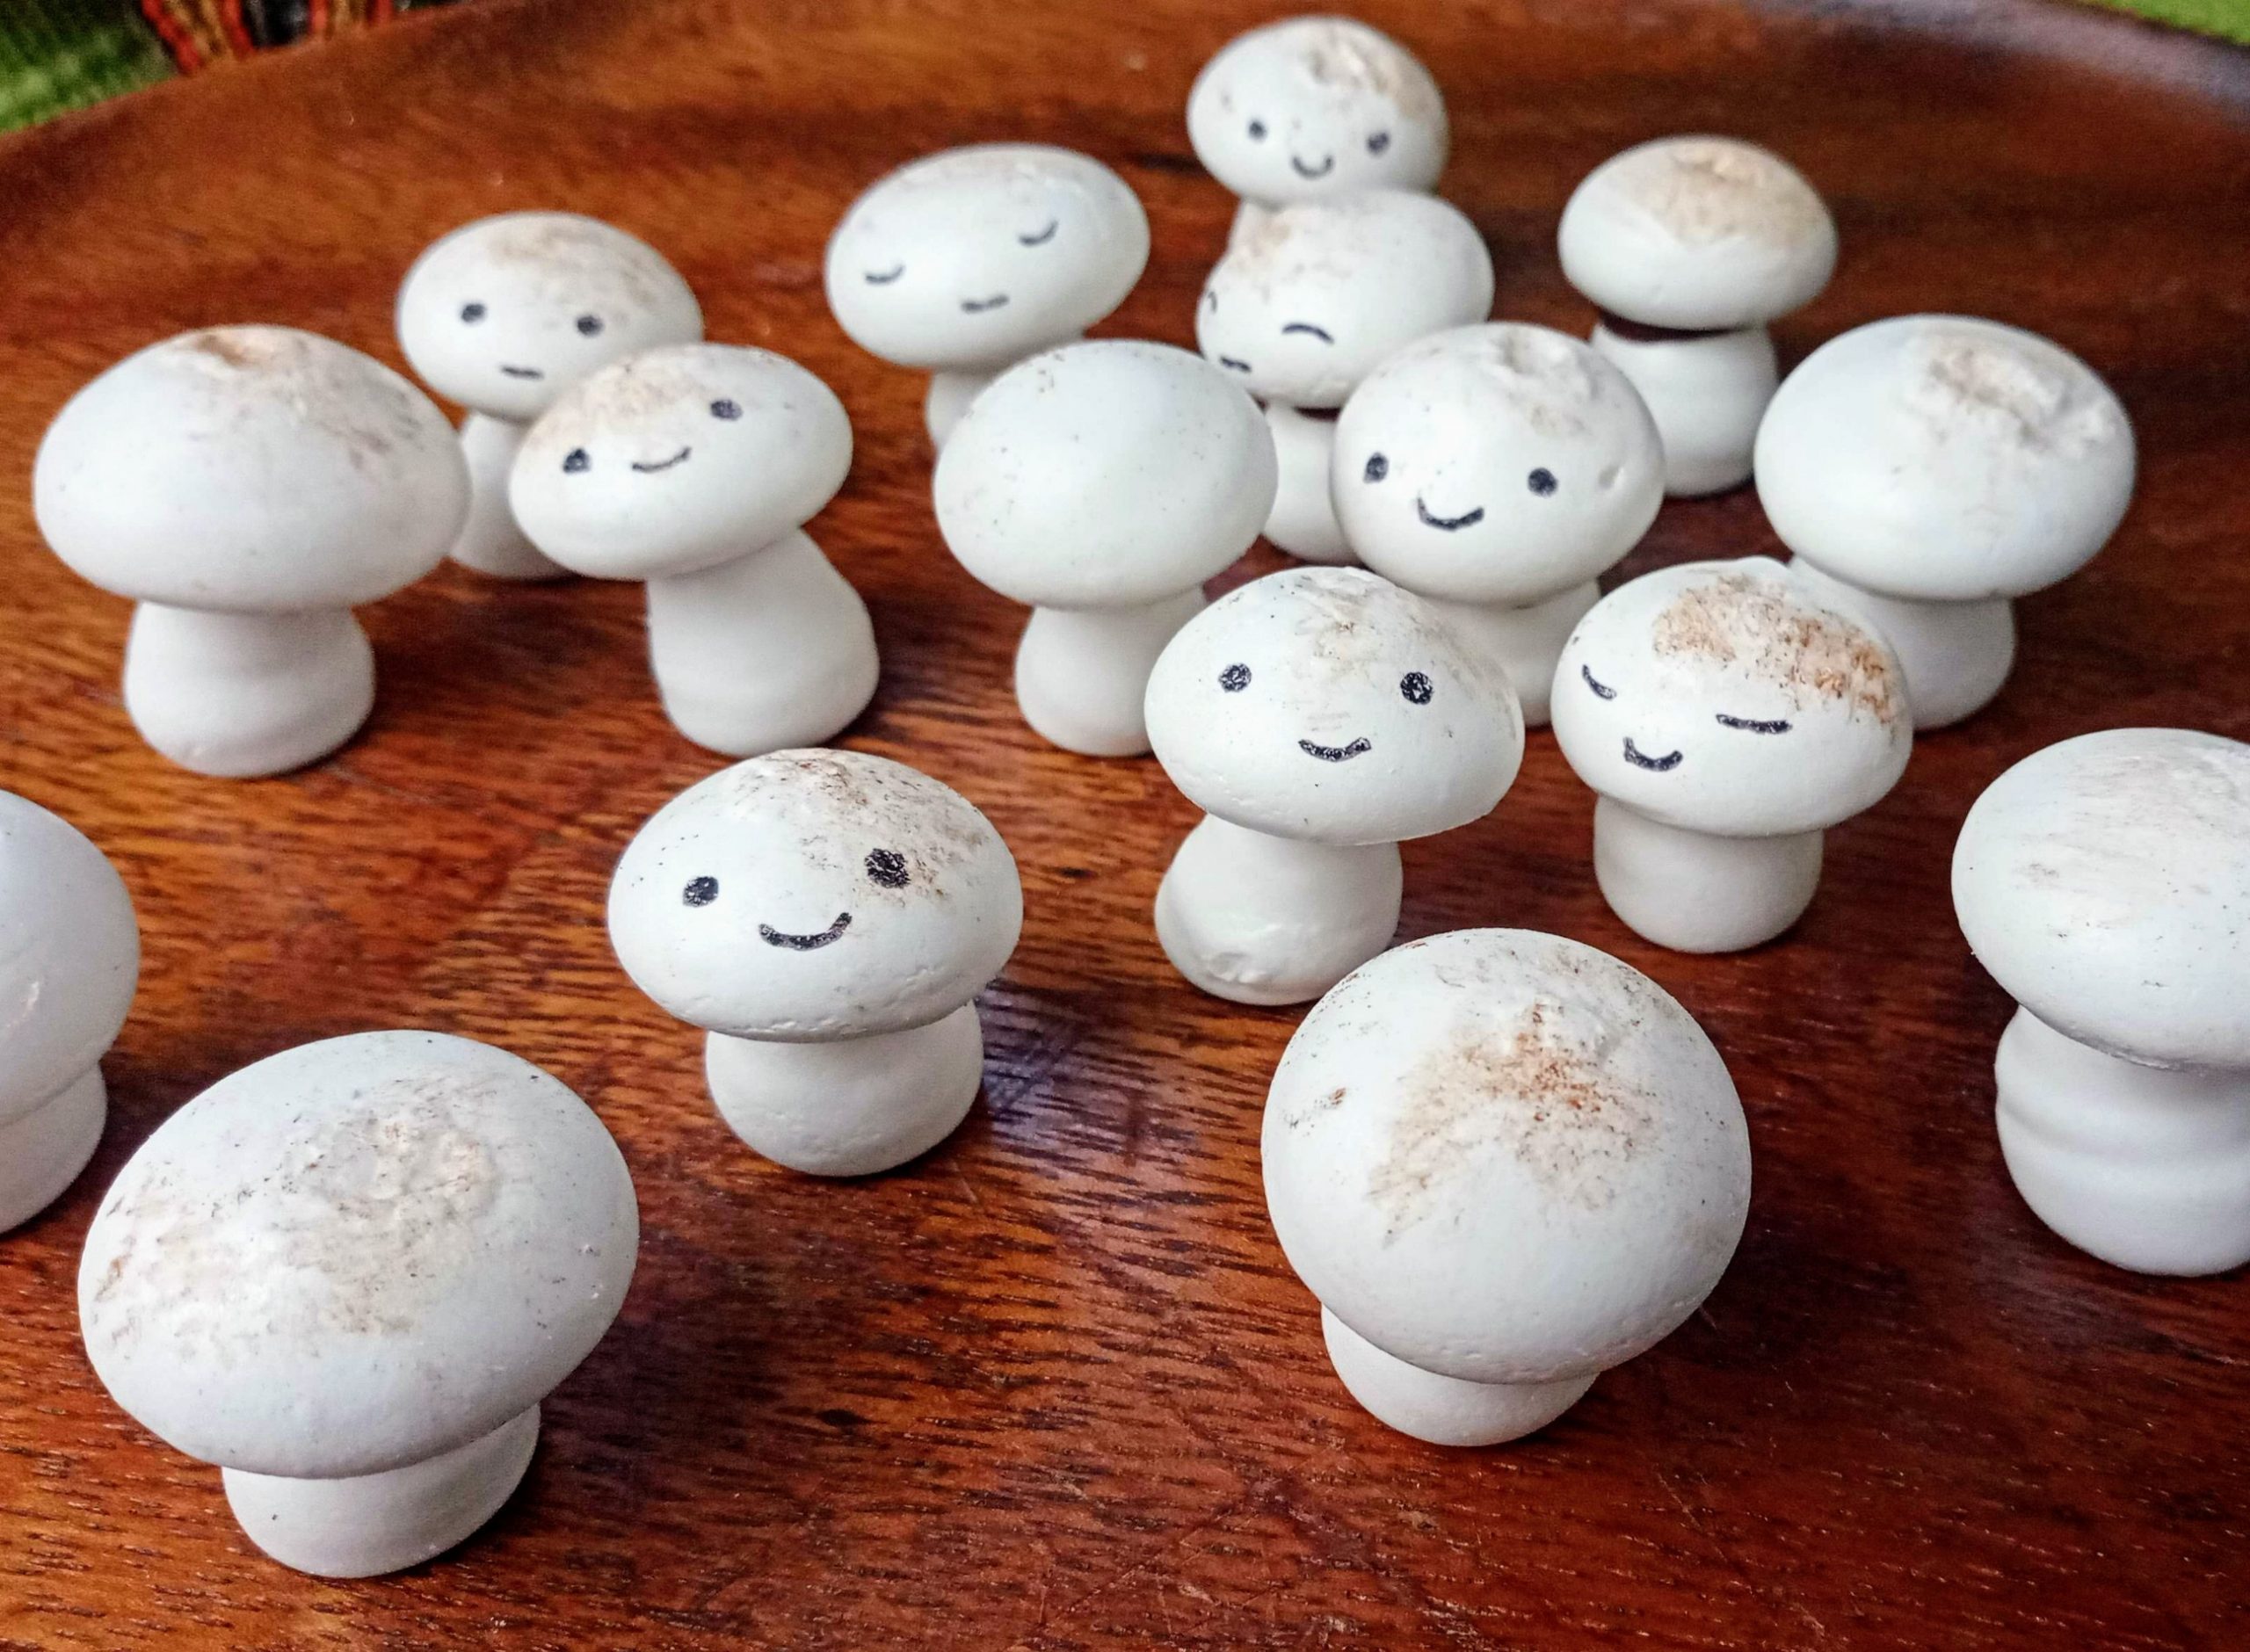
These little mushrooms, cute and fun as they are, have a lot of street cred. The oldest known recipe that directs us to form swiss meringue into mushroom shapes is in Fanny Farmer’s 1896 “Boston Cooking School Cook Book.”
These are traditionally used to decorate a holiday Bûche de Noël, but I like to whip them up (sorry, I just had to) any time of the year when the weather is dry enough.
These are a lot of fun to make and eat. You can play around with mushroom shapes and even go for a more realistic brown color. I opted for tiny and white so I could make my 7-year-old daughter squeal at how cute they are. I also used an edible marker to draw on little faces.
We are using a traditional Swiss meringue, so scaling the recipe is simple. Just make sure you are using twice the amount of sugar in relation (by weight) to egg whites.
Ingredients
90 grams egg white
180 fine sugar (white castor sugar will do, but for better flavor, blitz up some raw evaporated cane or turbinado sugar in a food processor. Whatever you do, do not use brown sugar )
1 tsp vanilla
¼ tsp cream of tartar
Pinch of salt
½ c good quality dark chocolate
1 tbsp baking cocoa for dusting caps
Special equipment
Electric mixer with whisk attachment
Piping bag with ¼- 1/3-inch round tip
Kitchen Scale
Method
Make sure your whisk attachment and bowl are squeaky clean. Any residual oils left over from previous baking adventures will cause your meringue to fail. I like to wipe my equipment off with vinegar or lemon and then let it dry before starting.
Weigh out your egg whites — 90 grams should be about 3 egg whites, depending on the size of your eggs (cover and reserve your yolks in the refrigerator for some rice pudding or custard later).
However much your egg whites weighed, weigh out twice the amount of sugar; this will ensure that your meringues are the correct texture and do not “weep.”
If using a sugar that is coarse in grain, like regular granulated or turbinado sugar, blitz in the food processor or blender for a minute so that the sugar can dissolve in the egg whites more easily.
Combine egg whites, sugar and cream of tartar and whisk until foamy, add the pinch of salt and vanilla and continue to whisk, scraping down the sides of the bowl with a spatula. Once the mixture becomes opaque white, add the sugar in two tablespoons at a time, while the whisk is going.
Continue to whisk until you can see a clearly defined trail in the mixture and it is glossy and white. It should hold its shape and definition when peaks are formed.
When your meringue is at the stiff peak stage, fill your piping bag and preheat your oven to 200 degrees. Pipe your caps and stems on parchment paper.
To pipe the mushroom caps, keep the tip of the bag at a quarter to a half inch from the surface and squeeze steadily, keeping the tip stationary. The cap will grow out in an even circular shape.
To form a more domed cap, lift the tip slightly while squeezing. Stop squeezing before you lift away the piping bag. Even out the little tail that forms by simply smoothing it out with a slightly damp index finger.
To form the mushroom stems, lift the piping bag steadily while squeezing. Don’t worry if they fall over, it happens. Leave the tail on these; they make assembly easier.
Bake the caps and stems for 1.5 to 2 hours. If you are able, leave them to cool and harden in the oven overnight (with the oven off). If not, turn the oven off and leave the door open, so that they can cool gradually.
Dust the caps with baking cocoa for a more realistic mushroom look. In the base of each cap, make a small hole with a paring knife. Your stems will fit in here after being dipped in chocolate. Melt your dark chocolate and dip the tip of the stems in and attach to the bottom of the caps. The chocolate will harden after 20 minutes and your mushrooms are done!


